
Tutorial
WhatsApp Tutorial
Connect your WhatsApp number, write a template and send a message from the CRM.
Chapters
1. Connect Your WhatsApp Number
Your company sends WhatsApp messages from its own number. You connect that number once. After that, anyone in the company can send messages from a record.
You need three things:
- You are an admin in Ambivo.
- You have a Meta business account, or you can make one when Meta asks.
- A phone number for your business.
Open WhatsApp settings
- In the CRM menu, scroll to the bottom and click Settings.
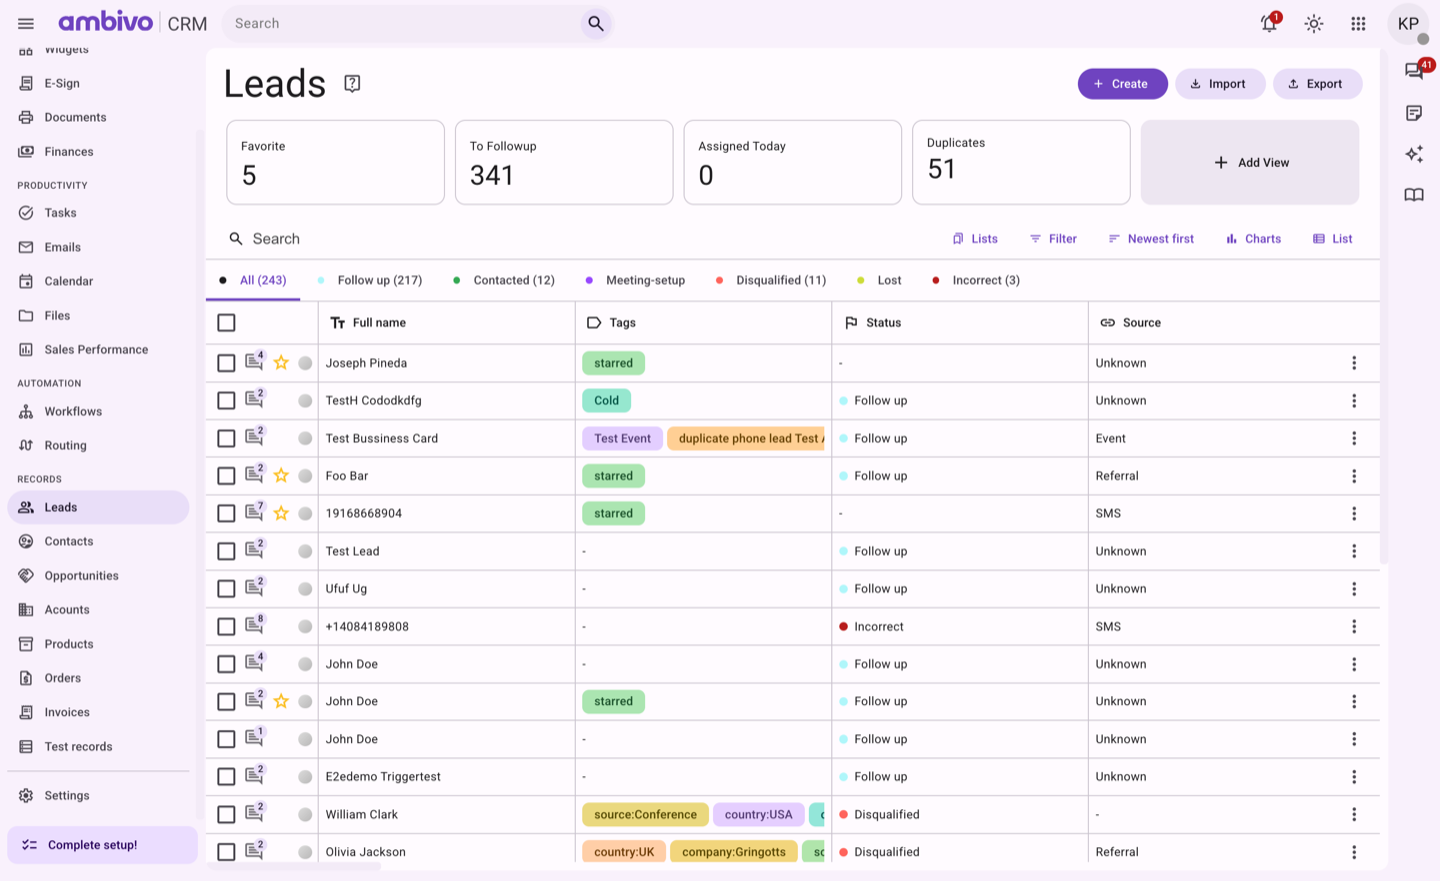
- In the Settings menu, click WhatsApp.
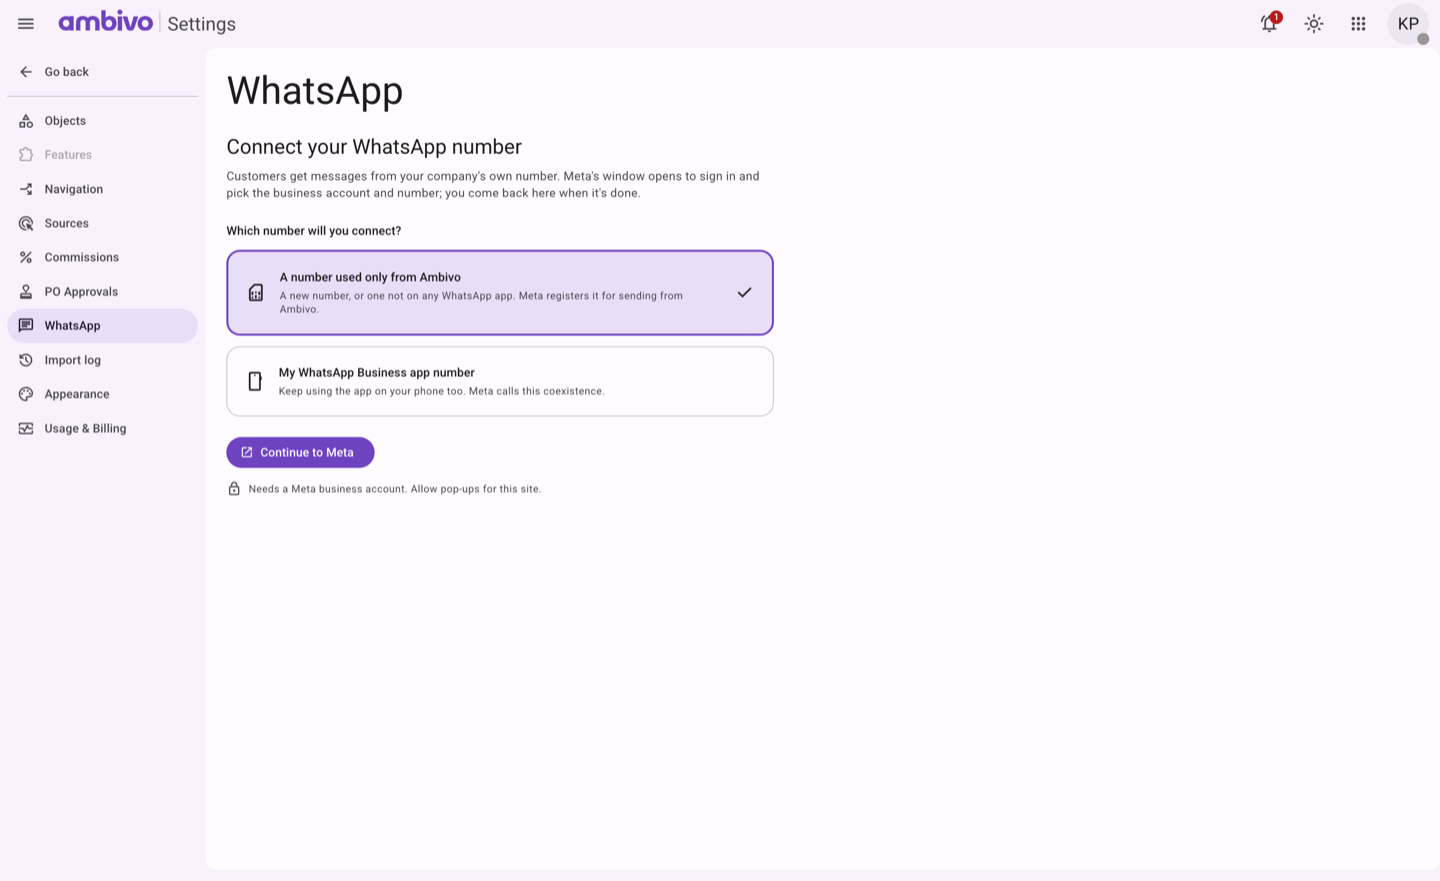
Choose the kind of number
Under Which number will you connect?, pick one:
| Choice | Pick it when |
|---|---|
| A number used only from Ambivo | The number is new, or it is not on any WhatsApp app. |
| My WhatsApp Business app number | You already use this number in the WhatsApp Business app on your phone. You can keep using the app. |
Sign in to Meta
- Click Continue to Meta. A Meta window opens.
- Sign in with the Facebook account that manages your business.
- Pick your business account, or make a new one.
- Pick the phone number, or add a new one. Meta sends a code to that phone to check it.
- Click Finish. The Meta window closes and you are back in Ambivo.
If the Meta window does not open, allow pop-ups for crm.ambivo.com and click Continue to Meta again.
Check the number
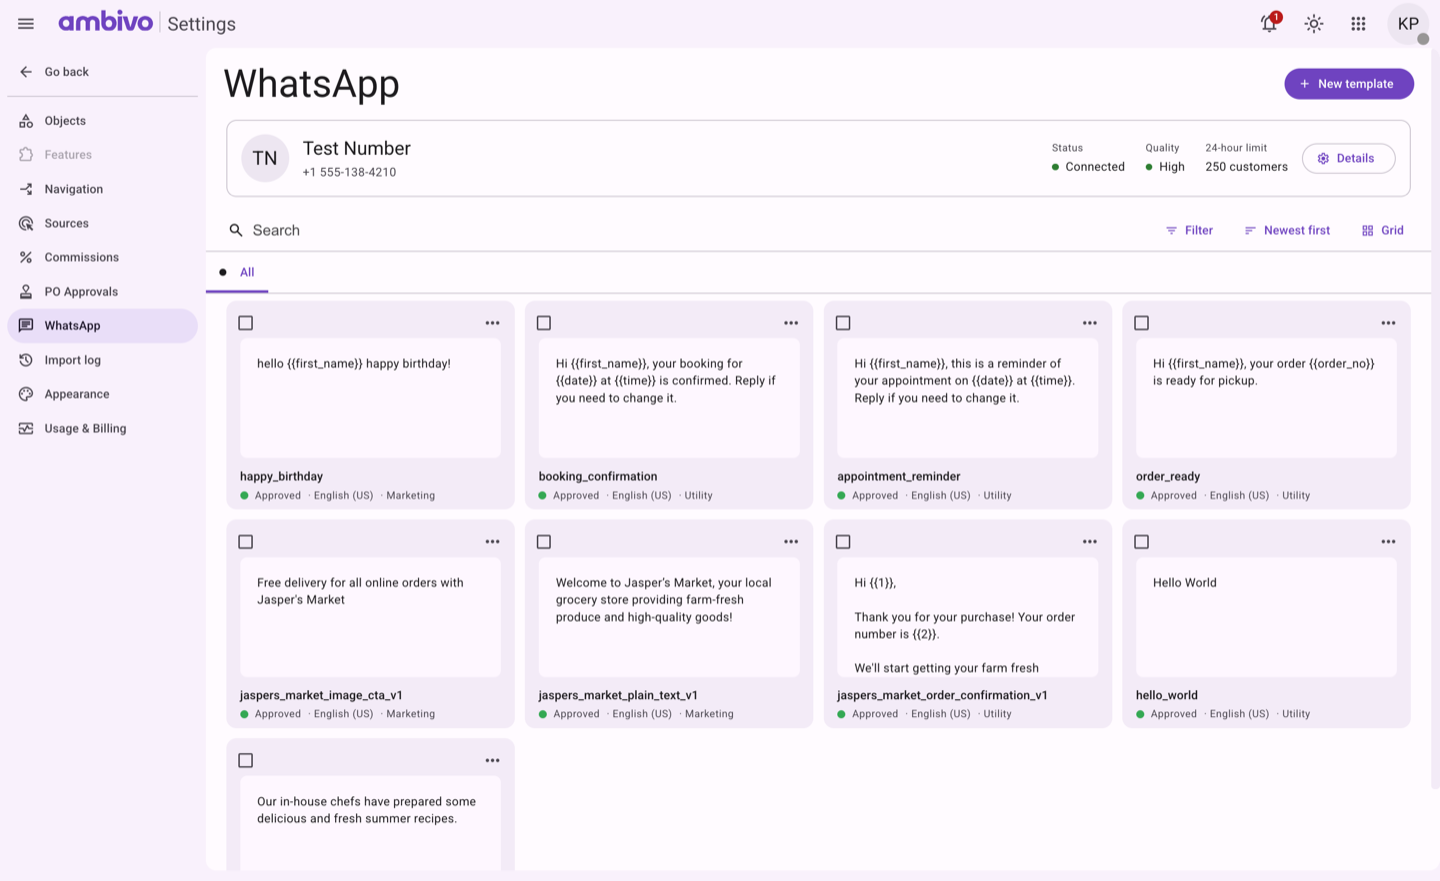
The page now shows your number at the top.
| Item | What it means |
|---|---|
| Status | Connected means you can send. |
| Quality | What customers think of your messages. Meta lowers it when many people block you. |
| 24-hour limit | How many different customers you can start a chat with in one day. Meta raises it as you send more. |
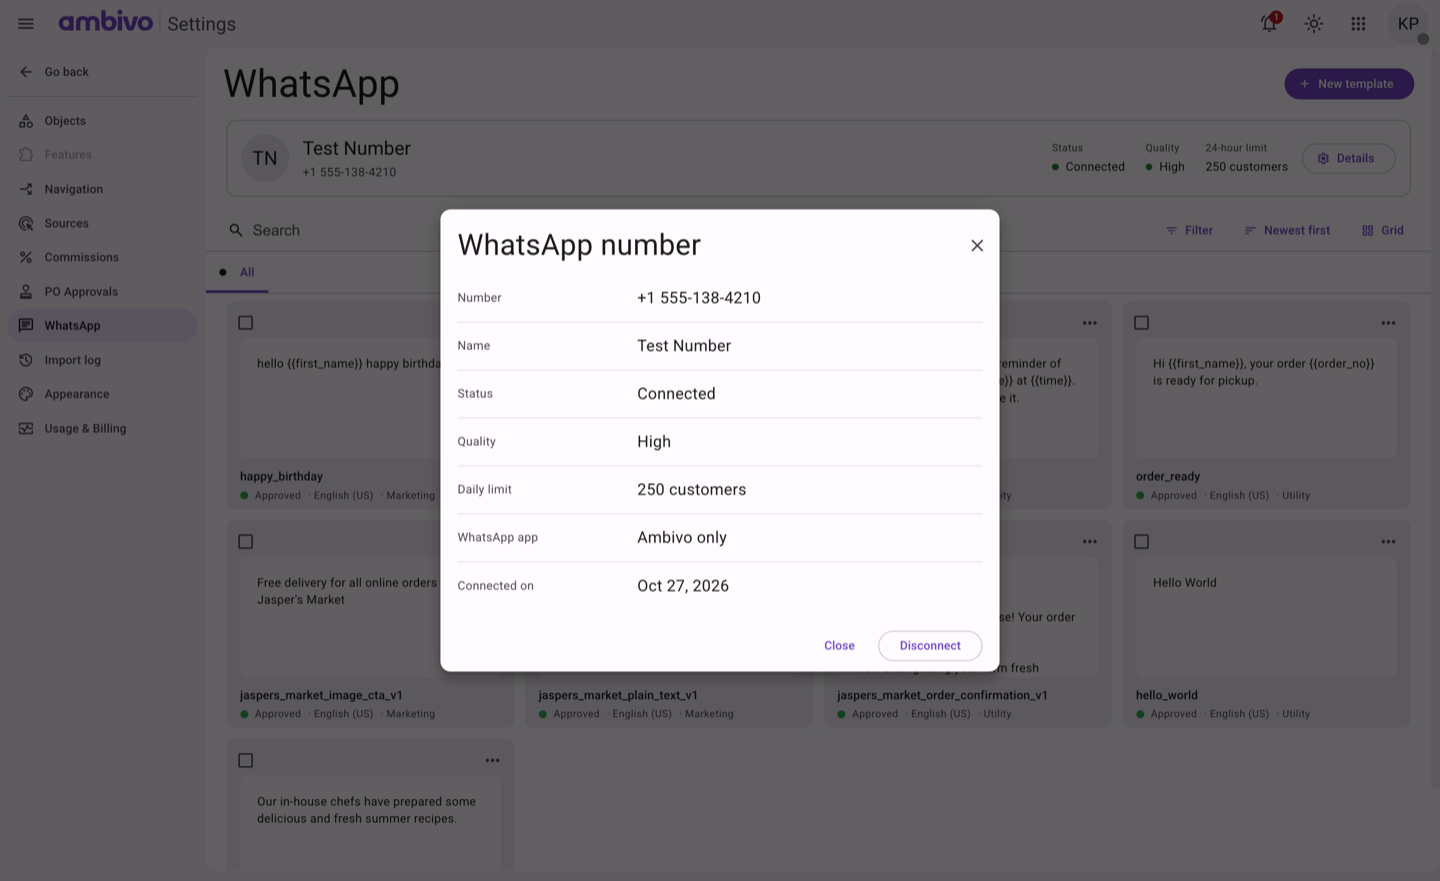
Click Details to see everything about the number.
Good to know
- One company has one WhatsApp number.
- Only admins see Settings, WhatsApp. Everyone can send.
- Disconnect in Details stops all sending from Ambivo. Your templates stay with Meta.
- If Meta stops your number, the page shows Reconnect with Meta and the reason. Nothing is lost.
2. Write a Template
WhatsApp lets you start a chat with a customer only with a template. A template is a message that Meta checks first. It can have values, like the customer's first name. Ambivo fills them in from the record when you send.
In our example, we write a message for new requests: "Hi Maria, we got your request."
Start a new template
- Go to Settings, then WhatsApp.
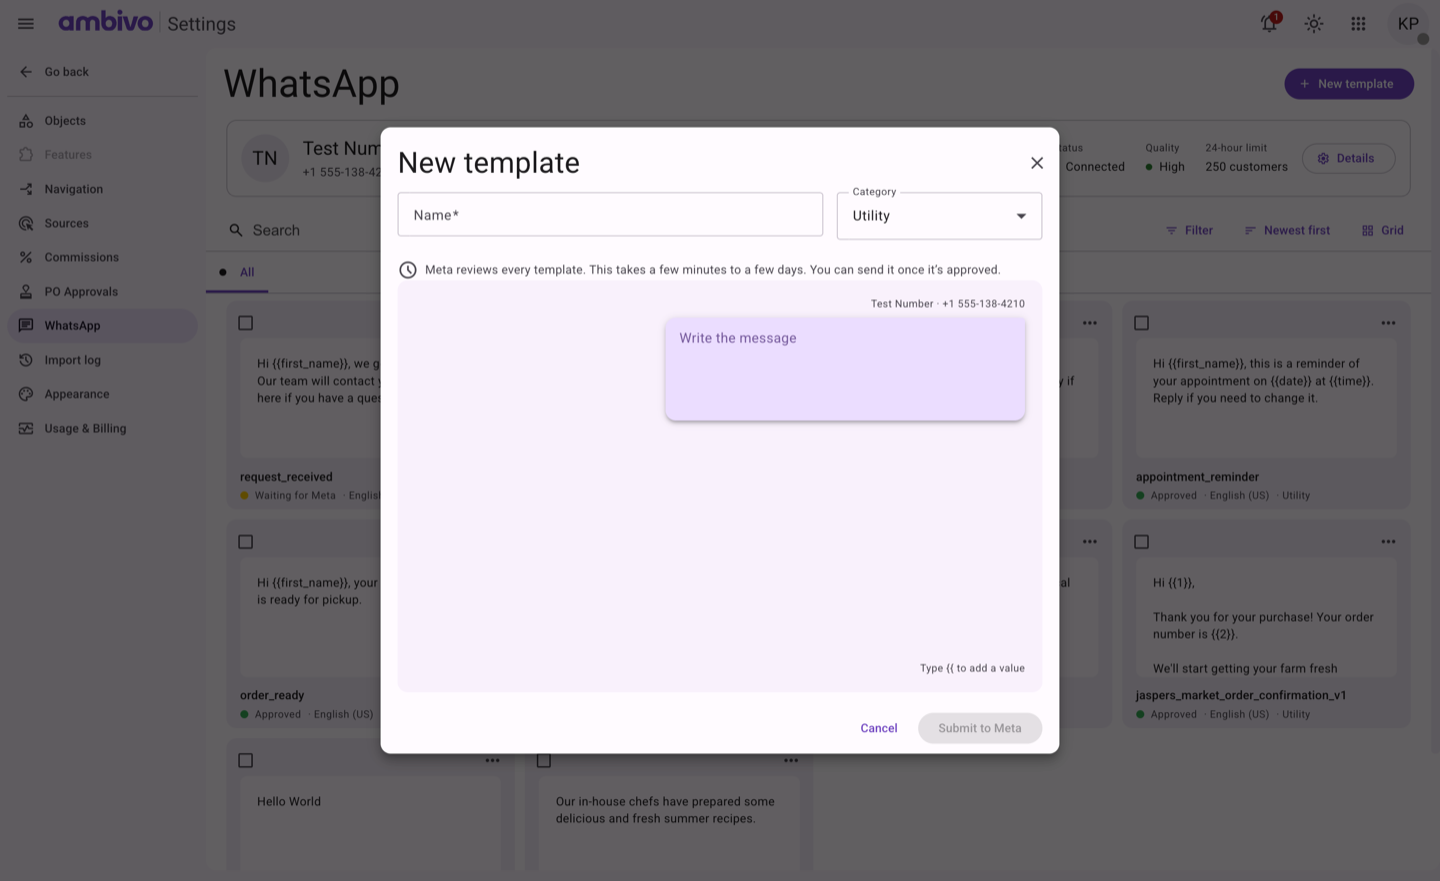
- Click New template.
Fill it in
- Fill in the name and the category:
| Field | Our example | Notes |
|---|---|---|
| Name | request_received | Meta saves it in small letters, with underscores for spaces. You cannot change it later. |
| Category | Utility | Utility is for orders, bookings and updates. Marketing is for offers and news. |
- Click in the message bubble and type the message.
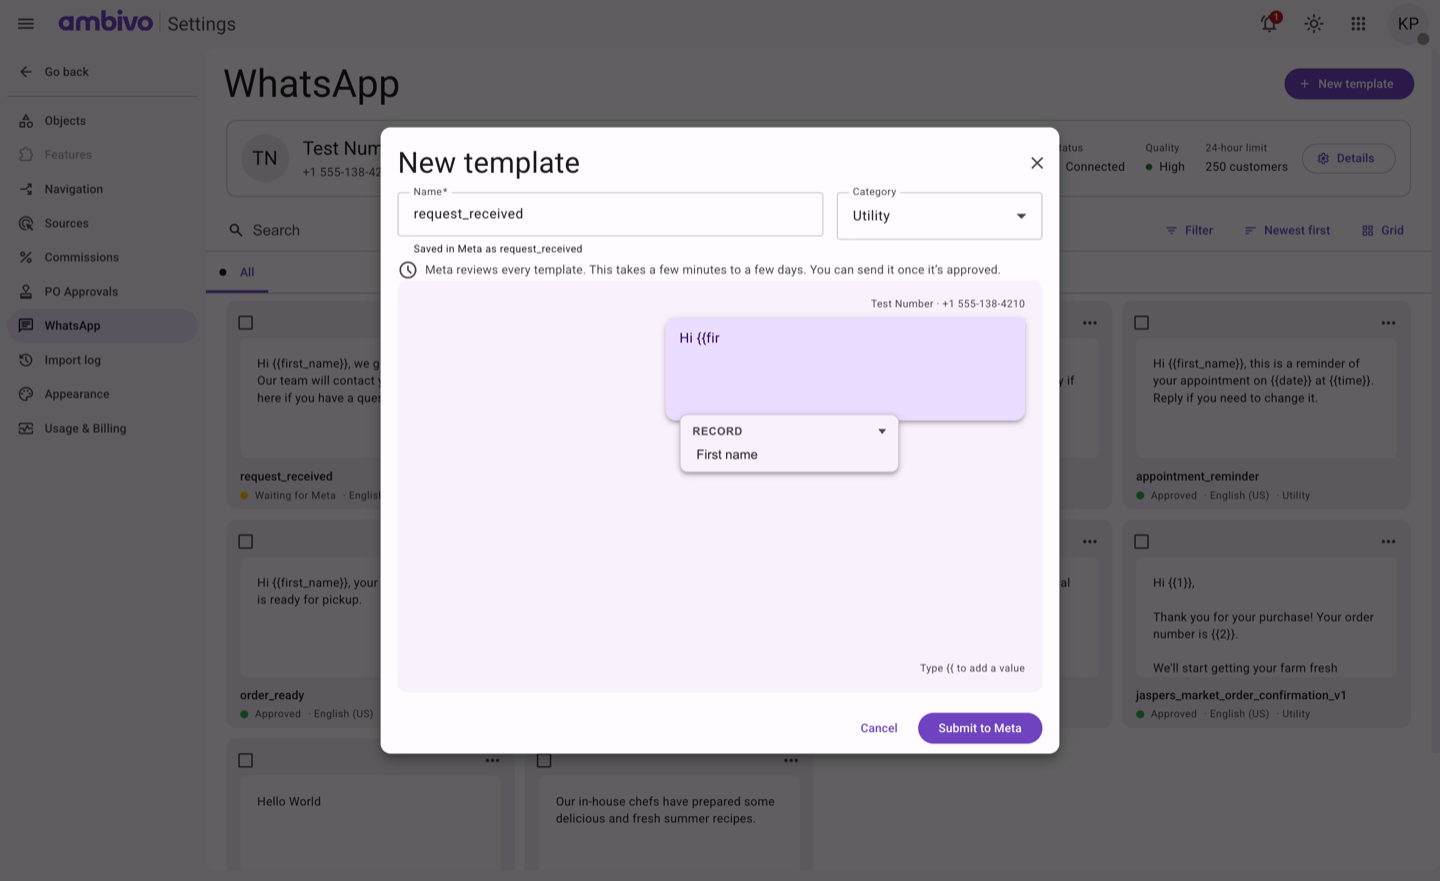
- To add a value, type
{{. A list of record fields opens. Type a few letters to find one, then click it. We pick First name.
- Type the rest of the message.
Our message is:
Hi {{first_name}}, we got your request. Our team will contact you today. Reply here if you have a question.
- Under Samples for Meta, check the sample for each value. Meta reads the message with these samples. We keep Maria.
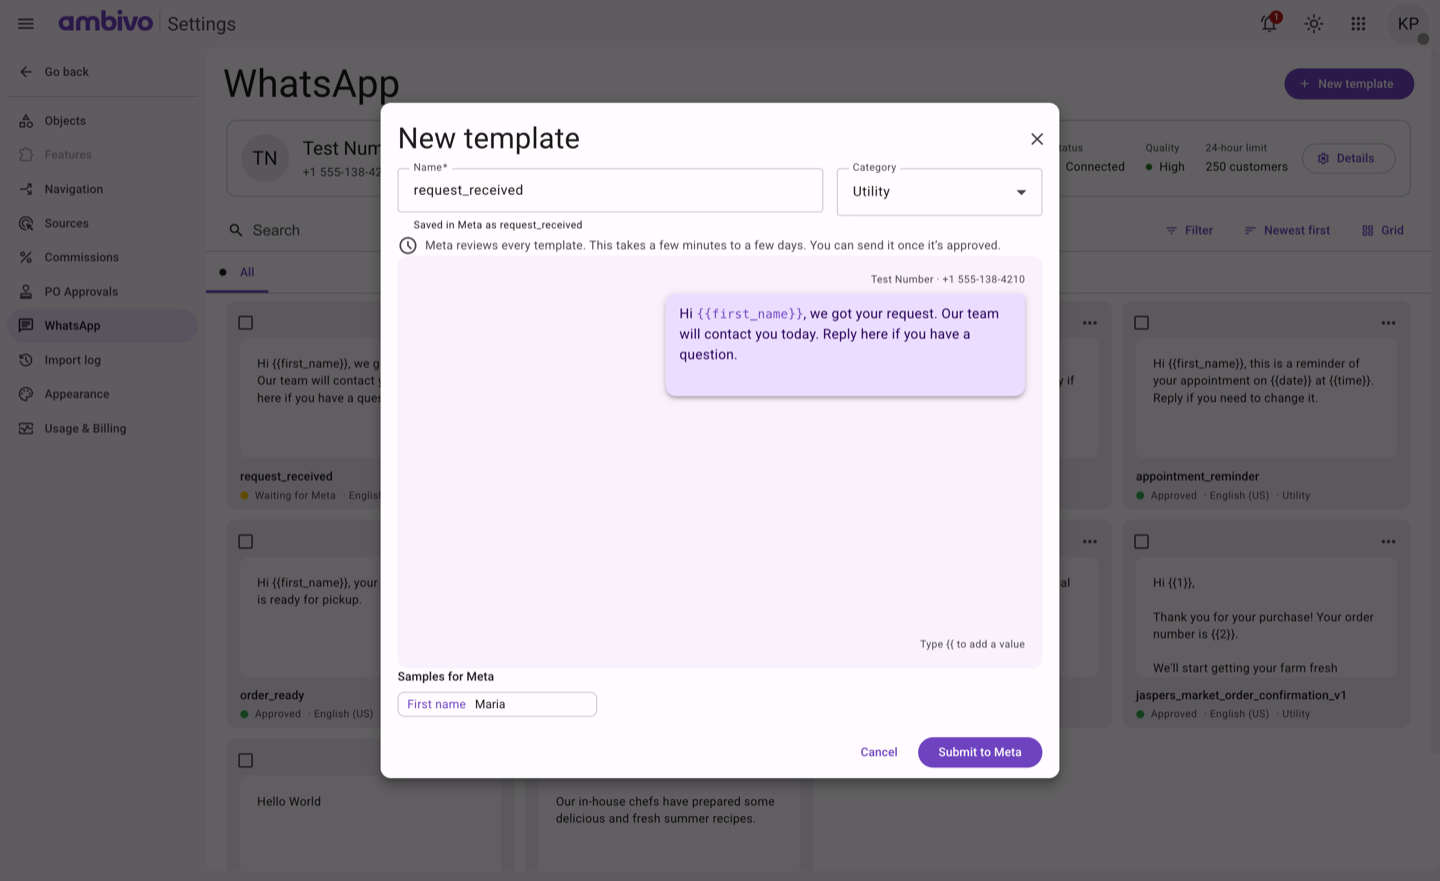
- Click Submit to Meta. Ambivo says the template is waiting for Meta.
- Click Close.
Wait for Meta
The new template shows Waiting for Meta. Meta takes a few minutes to a few days.
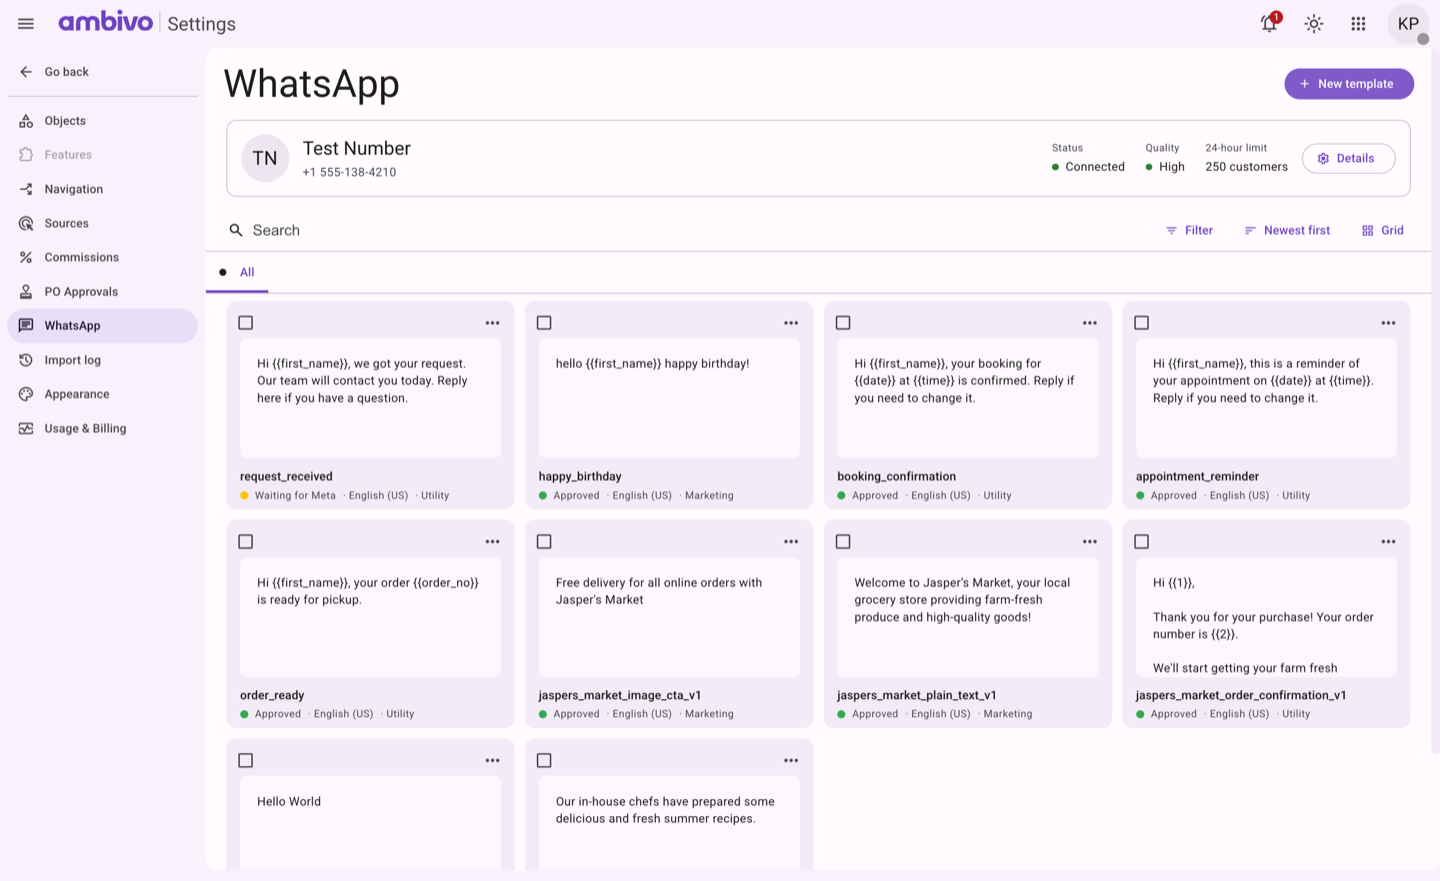
When Meta approves it, it shows Approved with a green dot. Now you can send it.
Good to know
- Click a template to see it on its own.
- You cannot change a template after you submit it. Write a new one with a new name.
- If Meta rejects a template, the card shows Rejected. Open it to see Meta's reason. Fix the text and click Submit as new template.
- Delete a template with the ... button on its card.
- A template with a value must have text before and after it. Meta rejects
{{first_name}}alone.
3. Send a Message
You can send a WhatsApp message from any record that has a phone number: a lead, a contact, an account or an order. Ambivo fills in the template's values from the record.
In our example, we send the approved template booking_confirmation to the contact Maria Lopez.
Open Send WhatsApp
- Open the list, for example Contacts.
- On the row, click the ⋮ button.
- Click Send WhatsApp.
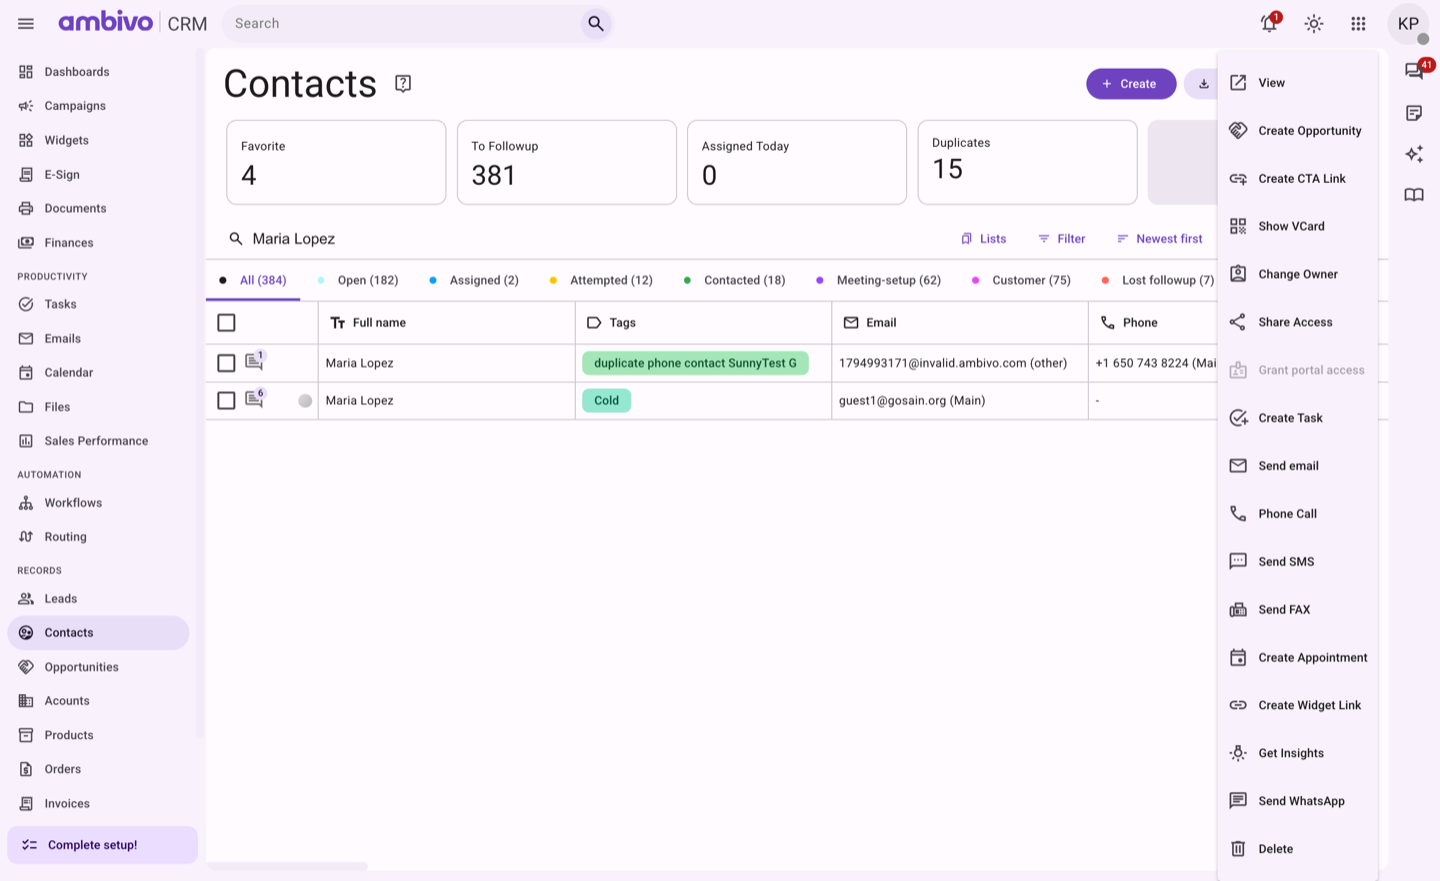
You can also open the record and click Send WhatsApp there.
Pick a template and send
The window shows the approved templates on the left. On the right, it shows who gets the message and how it will look.
- On the left, click the template. We click booking_confirmation.
- Check the message on the right. Values from the record are filled in. Here,
{{first_name}}is Maria. - Type the values the record does not have. We type Friday, Nov 21 for the date and 10:00 AM for the time.
- To change a value for this message only, click it and type.
- If the record has more than one phone, pick the number at the top.
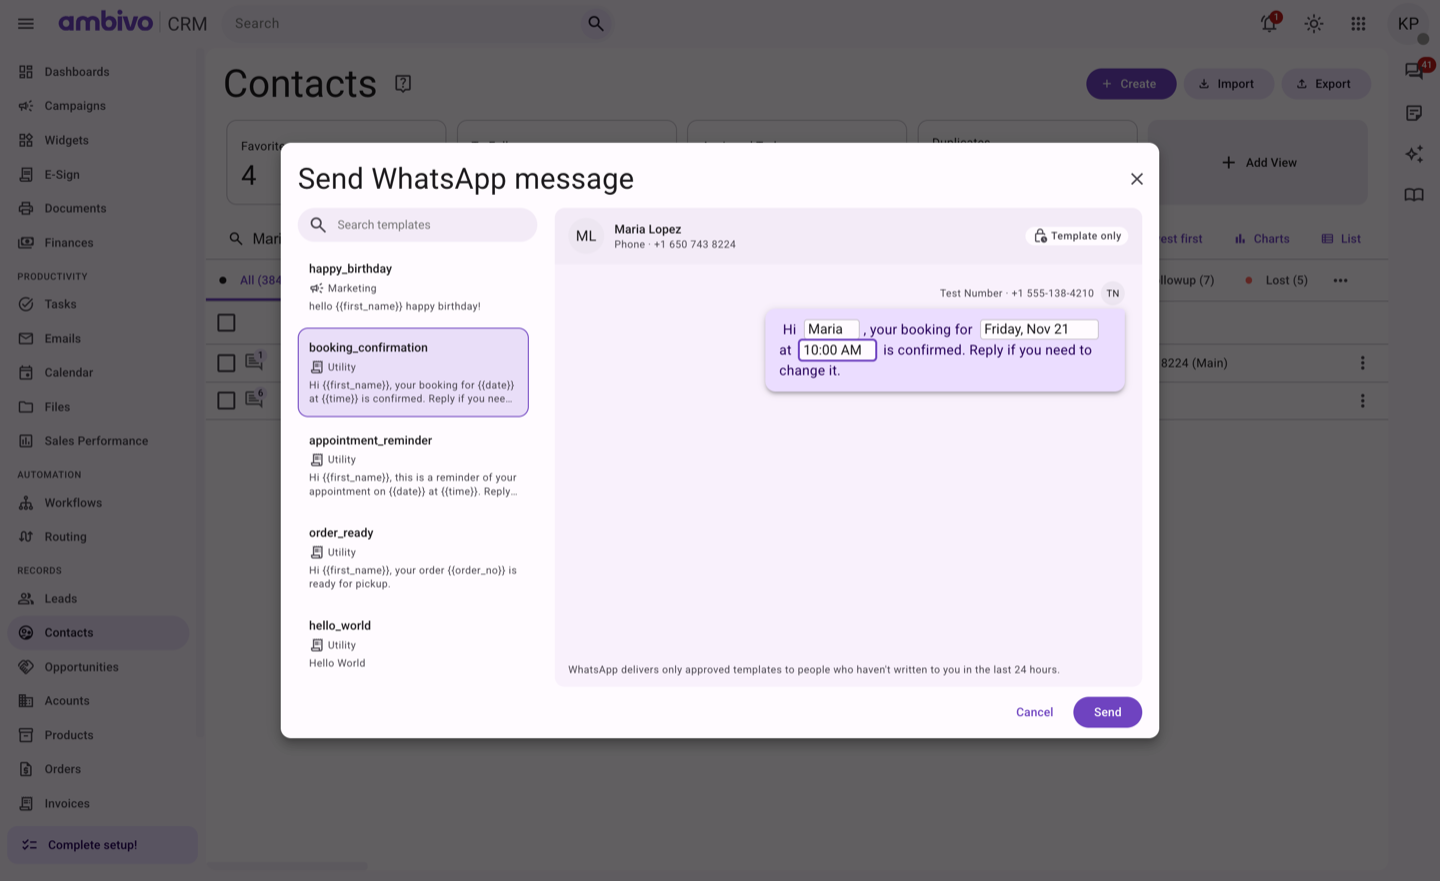
- Click Send. Send stays off until every value is filled in.
Ambivo shows On its way. The message is with WhatsApp now, and Maria gets it on her phone.
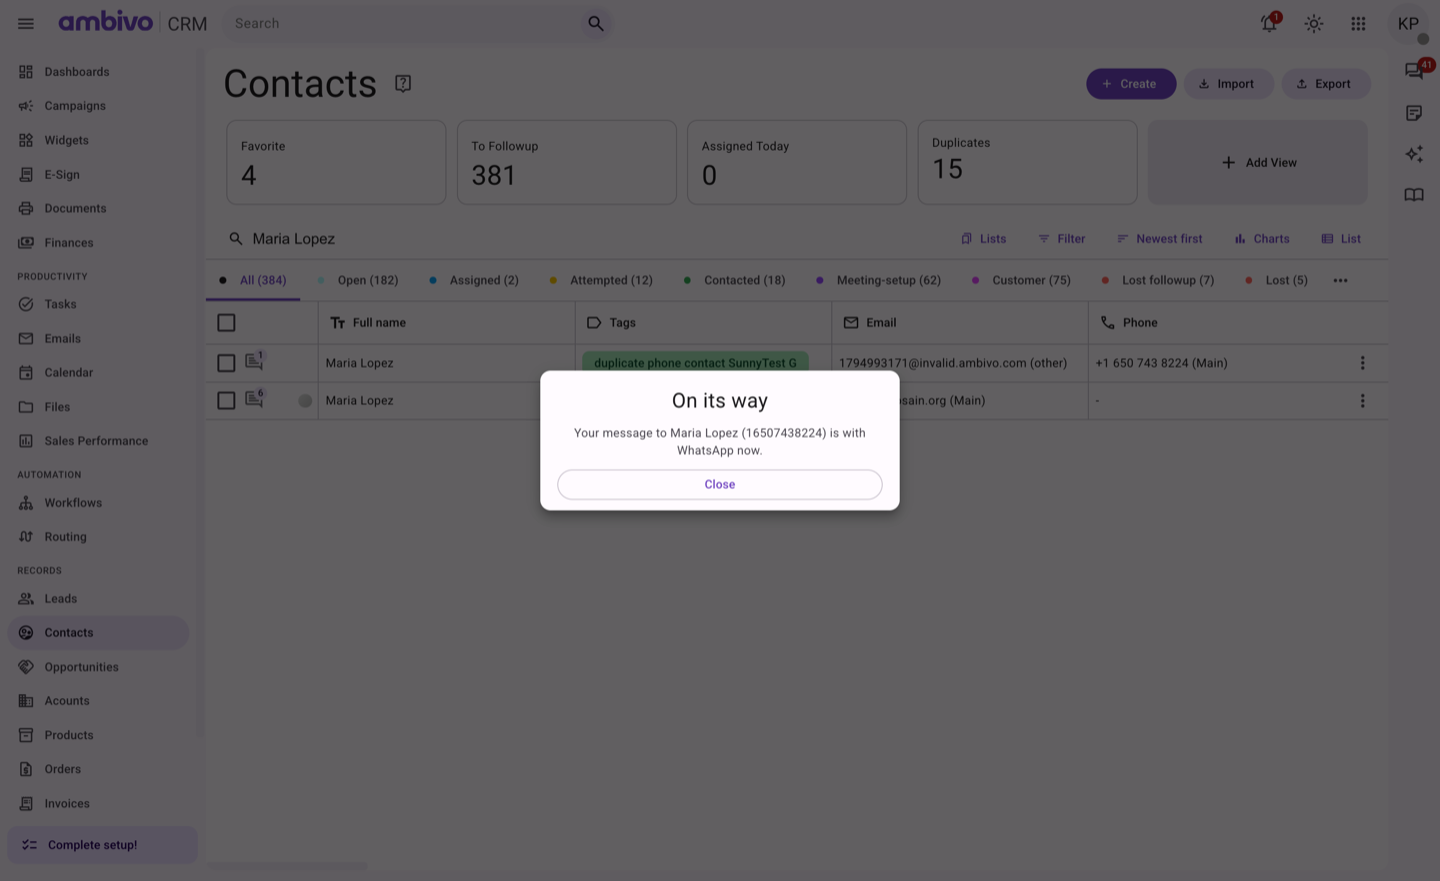
- Click Close.
Good to know
- Template only at the top means the customer has not written to you in the last 24 hours. WhatsApp lets you send only an approved template then.
- Send WhatsApp is greyed out when the record has no phone number.
- A phone number without a country code is read in the country of your WhatsApp number.
- If your company has no number connected yet, the window says so. An admin sees Connect. Everyone else is asked to contact an admin.